
We’ll look at how to utilize watercolour paint as an urban sketcher in this article. While urban sketching with watercolours is a distinct ability, and while many of the principles in this article apply to conventional watercolour painting as well, we’ll concentrate on the crucial strategies for painting on location.
Why is it so difficult to learn to paint with watercolours?
Using watercolour paint is a difficult art to master; it’s a frightening medium since we are always at the whim of how the water and paint interact on the paper, which even the most accomplished watercolourists cannot always predict. This is also part of the enjoyment.

Utilizing watercolours while urban sketching might be much more challenging.
I want to assist you in overcoming any fear you may experience so that you may bravely apply the watercolour paint and master working with rather than against the paint.
Watercolour Painting in the Traditional Style vs. Urban Sketching
There is a significant contrast between how conventional watercolour painters use watercolour paint in a home or studio setting and how an urban sketcher using watercolour paint on-site utilizes watercolour paint.
In essence, when we use watercolour paint brush on-site as urban sketchers, we do not function in the same manner that a typical watercolour painter would. Urban sketchers often have less time to prepare and watercolour paint, fewer equipment, and an unpredictable setting, but we also have less pressure since we are not attempting to create a piece of great art to display on the wall.
I feel that some urban sketchers muddle the distinction between these two distinct groups. Marc Taro Holmes immediately comes to mind.
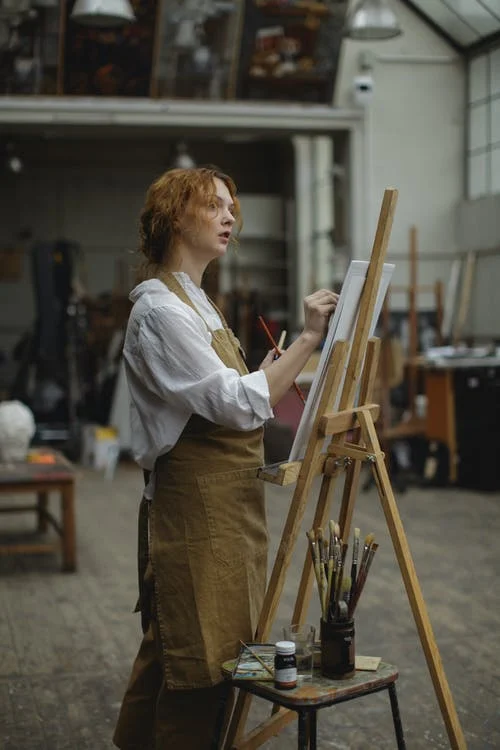
Marc blends urban drawing with the mood of a classic studio artist. Certain urban sketchers resemble ‘Plein air painters’ in that they may set up an easel in one location and paint a scene for a couple of hours.
In this lesson, we’ll discuss how to use watercolour as an urban sketcher to capture rapid drawings of our surroundings.
Sketching
You will read several articles and hear advice advising you to get the finest supplies possible when it comes to watercolour painting. To a certain degree, I concur.
However, while learning a new talent, such as watercolour painting, having more costly supplies might actually slow you down. You may also need the services of laundry pickup and delivery service that can help you remove hard colour stains from your clothes.
If you’re anything like me, you’re intimidated by pricey items! That undoubtedly sounds strange. Consider what I’m saying.

If I have an expensive notebook or paper (such as the Arches watercolour block I just purchased for commissions), you get fearful about “waste” and tighten up. Similarly, if you own really costly professional watercolours, you will be fearful of using them.
At least in my experience, it seems that the cost of anything has an influence on one’s capacity to explore, experiment, and be courageous. And these are precisely the things you must do and be while painting with watercolour paint. Visit http://ascianofiberartstools.com/how-to-get-started-with-watercolour-paint/ to read about How to get started with watercolour paint.
I believe that when you advance and gain confidence in your ability, then it’s time to update your materials. However, not all art supplies in the same price range are created equal. You may already have this notion if you’ve read my postings about the watercolour sketchbooks and paint kits I suggest.
For everyday watercolour urban drawing, you’ll need the following:
- Watercolour paint paper in a pad or book style that you can throw in your bag and bring everywhere with you, that you are not worried about using or becoming dog-eared, and that is capable of handling both sketching and watercolours without becoming a soggy mess
- 12 pans of colour (slightly more or less is acceptable; 36 is excessive) in a small plastic or metal box with room to mix colours in the lid
- Round brushes (try sizes #2, #6, and #10), a flat brush (not necessary but excellent for painting straight edges), and a dagger brush (not necessary but extremely versatile)!
- Synthetic, natural, or a combination of the two is acceptable…
Do not overthink this; just get watercolour paintbrushes that are within your budget but not ultra-cheap craft-type brushes that may be labelled as watercolour brushes and come in a bundle of ten. These are not desirable. Acquire the genuine article.
The Most Important Tips for Improving Your Watercolour Painting
Lightly Sketch
If you’re working just with watercolours paint, draw extremely lightly. Heavy pencil lines and erasing can deteriorate the paper surface, and when you attempt to paint over them, the paper will either reject the watercolour paint or the surface will be much thinner, causing your paper to wrinkle more than in other areas. Obviously, as urban sketchers, we are not aiming for perfection, but it is a nice habit to develop. Additionally, you do not want to harm the paper surface.
Initial layers should be quite light
Watercolour painting is all about layering. Because light colours cannot be painted over dark colours (as opaque media such as acrylic and oil can), you must arrange your painting a bit more carefully. You must comprehend where your brightest lights and deepest darks will be located.
Allow for white space
To add depth and contrast to your painting, leave some white space around the areas that will be highlighted. This is difficult at first, but practice recognizing where those highlights should go in each drawing and avoiding painting them entirely.
Create a setting with a lot of contrast
Creating a setting with strong lights and darks will assist us in creating a dynamic painting with plenty of depth. If you’re out drawing on a dismal, cloudy day, this will be challenging. If the light shines at any place and casts shadows, take a snapshot so you can refer to it later. Strong lighting and shadows are essential for bringing any watercolour drawing to life.
Combine your dark hues
Avoid using black directly from the pan or tube; in fact, discard your black pigment entirely; you don’t need it. You may create quite fascinating dark colours by combining Ultramarine (blue) with Burnt Sienna (brown). You can read about Spotlight on sienna by clicking here.